
Totally Tie Dye Girls -10yr- Tie Dye Cake
Idea#
21849
From
Polly in Atlanta, GA, USA
Date
August 2010
Award
Special Mention
I pulled off a Totally Tie Dye party for my 10 year old daughter at our house while concentrating on keeping a tight budget.
INVITATIONS: I started with tie dye birthday invitations. I printed 4 x 6" tie dye invitations on card stock that I created in a computer program. I used a tie dye backdrop on the paper and then put the words We're "DYE-ING" to Celebrate Mina's 10th Birthday! Join us for a Totally Tie Dye Party. I then created mailing labels using the same tie dye backdrop to go onto the envelopes.
DECORATIONS & PARTY FOODS: The party took place both inside and outside under a covered porch. Inside I had the food table that was covered in a plastic purple tablecloth with lime green colored plates and matching colored tie dye napkins that I found. I made a centerpiece that was tie dye and peace signs with a happy birthday sign on top. I made it by taking a small square box and covering each side with the same tie dye pattern used for the invitations. I then took a paper towel roll covered it in lime green tissue paper and taped it inside the box.
I created a round sign with the same tie dye backdrop and the words Happy 10th Birthday Mina! I put the sign on a popsicle stick and put it into the top of the paper towel roll where I wedged different pieces of colorful tissue paper inside the hole to both plug it up and hold the popsicle stick in place. Then on the paper towel roll I glued small strips of purple card stock that I had curled slightly so they had an arch to them. I created peace signs in 4 different colors on my computer printed them on cardstock cut them out and glued them to the ends of some of the curled pieces. I also had some plain curled pieces for filler. I put rocks in the bottom of the box to weigh it down and stuffed the box with colorful tissue paper. This made for a colorful matching centerpiece.
The food was basic party food but I made sure to put out a bowl of M&M's to capture all the colors. I also filled the dining room with 18 helium balloons in 4 colors with a bit of ribbon hanging down from each. This was a bit of a splurge if on a tight budget but it brought out all the colors on the table below and it made the room even more festive. I used a multi colored party favor bag and put a label of the same tie dye pattern with the child's name on each bag. They were empty waiting to be filled so I set them on the table for additional decoration. My husband and I greeted the guests in tie dye shirts that I had made the weekend before to blend in with the theme and to be additional decoration.
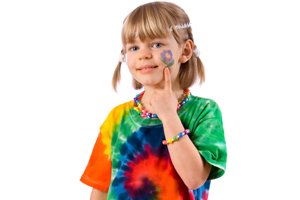
ACTIVITIES & GAMES: We started off the party with tie dye hair. I used colored hairspray to make swirls and colors in their hair. Then the kids went outside to two different activity stations. The first was sand art. I had peace sign plastic bottles with purple lime green orange hot pink and electric blue sand to choose from. Once finished they went to the next station which was tie dye shirts. I had white cotton shirts for each child (found them for $1.77 each online) and I helped them twist their shirt into a spiral design and then rubber banded them to keep the spiral intact. I had 5 different tie dye colors in bottles to choose from. I researched on which colors worked best together and created a chart that I displayed for reference on which colors worked best next to each other and which colors would turn brown if placed next to each other. The kids were able to use this as a guide to decide on their colors and create their own design.
I assisted them in applying the dyes to the shirt to make sure they fully saturated the cloth. Once finished the shirt went into a Ziploc bag that was identified for each child with another tie dye label with the child's name and instructions on the back for the parents on how to wash out the shirt once home (the shirts need to sit for 8-24 hours to soak up all the dye).
We then came inside and played a game of "Pin the Peace Sign on the Tie Dye Swirl". I had cut a piece of cloth (3' x 2') and hemmed the edges for a nice clean banner. I then had tie dyed it using a spiral design (this cloth was hanging the entire time so it also served as additional decoration before the game began). I had made peace signs (the same type used on the centerpiece) printed the child's name on each one had them laminated in a thick 10mil laminate and put magnets on the back so they could use them after the party. For the party I put tape on the back of each peace sign and that was their game piece to put on the tie dye spiral cloth. We did a traditional game with blindfolding them spinning them around then seeing if they could put their peace sign on the center of the spiral. This was a HUGE hit with lots of laughing cheering and excitement.
The last indoor activity was a tie dyed pillowcase that I had made so that each girl could sign for Mina to keep. I wrote in the middle Happy 10th Birthday Mina and the girls wrote messages or just signed their name all over it. I ended up making the actual pillowcase which was a third of the price of purchasing one and tie dyed the design the weekend before. This pillowcase was also sitting out the entire time so that it served as decoration and gave the girls a chance throughout the party to write on it. The final game was outside for a pinata. I made the pinata out of paper mache and then decorated it by adhering small squares of colorful tissue paper in a spiral design for a completed tie dye pinata look. I filled it with candy tie dye silly bands smiley face pencil sharpeners and tie dye erasers. Another huge hit (literally)!!!
CAKE FAVORS AND THANK YOU NOTES: The final events were the cake and presents. I made the cake which appeared to be a plain layered sheet cake with white icing simple peace signs (I put 10's on there and made the 0 into a peace sign) and writing complete with 10 tie dye candles on top. But the real surprise was once we cut into the cake it was a multi colored tie dye cake. When making the cake I took cake batter divided it into 4 bowls and colored each bowl with food coloring (neon purple green pink and blue). I then poured the colors in alternating patterns into the pan to bake. Once baked and layered you could see the multi colored swirl patterns in each slice. This was a HUGE hit. The girls loved it!! Mina then opened presents in front of the tie dye banner that was used for the game and I was able to get a picture of each girl with Mina in front of the banner as a backdrop. I will use each picture as the cover of each girl's thank you note so that they have that token memory from the party. The party favor bags mentioned earlier were then filled with their sand art the peace sign magnet their pinata goods and the Ziploc bag with their tie dye shirts.
CLOSING: I have asked all the moms to take pictures of the girls in their shirts and email them to me. The designs have been great and in bright colors of pink yellow purple lime green and blue each design uniquely different. By making many items I was able to pull off a fun party for Mina and her friends and saved money at the same time. In the end the kids were able to take home some great prizes including a shirt they created and Mina has some keepsakes of her own in the signed pillowcase and the tie dyed spiral cloth that we used for the Pin the Peace Sign on the Spiral game which now hangs over her bed. It was the Perfect Party for all!!!! "
_______________________
About | Privacy Policy | Contact Us
.