
Minecraft Party -10yr- Build with Boxes
Idea#
23574
From
Sheila in Ottawa, Ontario, Canada
Date
February 2012
Award
Runner Up
My daughter Claire LOVES Minecraft, a sandbox computer game in which you construct a world from blocks , mine for materials, defend yourself from enemies - sort of like virtual LEGO but much more creative. For her tenth birthday we tried to bring Minecraft to life in our home.
INVITATION - we printed out a screenshot of Claire's character in Minecraft standing on top of a huge Minecraft cake. You can find free online programs to customize your character's skin" - the character on the invite looked just like Claire and we added a caption " Whoa. That's a big cake". Inside the invitation it said " Wanna help me eat it ? " and then included the party details.
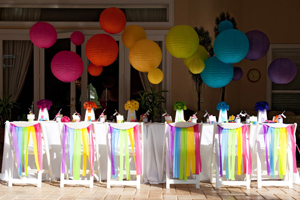
DECORATIONS: - There are endless possibilities for decorations so long as everything is square or cube shaped. We tried to replicate items from Minecraft - Claire would create something in her Minecraft world such as a sign that read " Welcome to my Minecraft Birthday Party" and then we made one for the entrance using a simple cardboard box and brown parcel paper.
DIORAMA: If you search online for "Minecraft Papercraft" you will find lots of templates for Minecraft items that you can print out then fold into 3D shapes. We used card stock paper which is stronger than regular paper and therefore blocks could be glued together and assembled into a Minecraft diorama. I got some thick insulation foamboard from Home Depot and cut out the larger shapes such as a mountain which we then covered with Minecraft cobblestone paper. You can also buy thin green foamboard for the base of the diorama and cut out areas for a lake lava pit etc. Some scrapbooking sheets also have Minecraft-like textures which is how we created the lava coming down the mountain and the netherworld portal . I also got a mosaic stone tile sheet from Home Depot - cut up the sheet into individual stone tiles and then added them to the diorama for a realistic feel.
CRAFTING TABLE : A crafting table was made by simply adding lines to the top of our square coffee table using black electrical tape.
COSTUMES: - More insulation foamboard was used to create a lifesize diamond pickaxe - you can find templates for the pickaxe online just search Google images - I hand painted the squares with acrylic paint.
MOD HEADS: I printed out a pattern of a Minecraft zombie head and observed the pattern of squares. I could have hand painted all the individual squares onto a square cardboard box but that would be very time consuming. Instead I brought the pattern to Home Depot and matched all the various green colours with free paint sample sheets - grabbed the sheets then cut them into 1x1 inch squares. Then I covered the sides of the box with a double sided mounting sticky sheet and applied the squares. Cut out two rectangles for eyes and it turned out great ! The kids loved posing in the zombie head holding the pickaxe. Took photos with my smartphone and emailed them to the kids right away.
ACTIVITIES: About half the kids in the party had already played Minecraft ( there is a free online version ) - and for the other half we played a short Youtube video that explained the game. First the kids needed to build a shelter and for that they would need wood. We created a tree on the wall using foam sheets and added papercraft ``wood`` cubes for the kids to gather. Then they brought the wood to the crafting table and made planks ( popsicle sticks ). Next they were told they needed to build a shelter big enough to protect all ten of them - from popsicle sticks ? No - we gave them cardboard boxes. Here I got lucky - the party was close to Valentines Day and I was able to find lots of long cardboard boxes used for transporting roses that the stores had just thrown into the recycling bins. The kids had a blast with these boxes. They built structures but then just when they thought they were safe - Yeaagh ! Creepers ! My 15 year old son and his friend played the part of Minecraft creepers who try to get into your house and explode it. The kids squealed and tried to hide - the boys would destroy the cardboard shelter then the kids would chase them off with the pickaxe and rebuild their shelter. After building their shelter the kids were ready for the next adventure. They would have to go into the cave ( our basement ) and explore for precious minerals. However they would need torches. To make a torch in Minecraft you need sticks and coal. The kids gathered more wood for sticks then searched for coal ( small black glass mosaic tiles ) which were hidden around the room. They assembled these materials at the crafting table into torches (flashlights each kid received one and got to take it home) and then explored the basement for redstone ( acrylic red gems from the dollar store ). Occasionally a zombie would appear ( Claire's brother Connor - he also loves Minecraft ) however zombies don't like fire so if all the kids shone their flashlights on him at once he would run away. After gathering the redstone the kids were ready to explore even more dangerous territory - the outside ! We took all the kids to the local baseball diamond which was covered in snow . They had to close their eyes while I scattered about 75 fake diamonds around the field ( again the dollar store has great fake gems). Their task then was to find all the diamonds ( not easy to see ) and then bring them back to home case where they could be safely stores in a chest ( decorated cardboard box ). The only problem was once again zombies . Connor and his friend were the zombies and the rules were if a zombie touched you they got all your diamonds. If you beat the zombie back to home base though you were safe. My daughter got to play the part of defender - she carried the diamond pickaxe and chased the zombies. If she got one the zombie had to surrender all the diamonds he was carrying. This went on for about an hour until the zombies were exhausted. The kids had a blast ! We divided up the diamonds equally and put them in their loot bags. Now the kids were tired and ready for a quiet activity. For a craft they made their own Minecraft swords. Some prep required beforehand - I got the sword template online then enlarged it to approximate life size drew it onto paper and then made twenty copies. Each square in the pattern was approx. 3/4 " x 3/4" so I took sticky foam sheets and drew out a a grid on the back of each one measuring off the squares and then cutting up the sheets into about a zillion squares. The cool part is you can use all different colors and the kids custom pick the ones they want for their sword. Then I took the large cardboard box our flat screen TV came in and traced out the shapes of twenty swords. Cut out the shapes with a boxcutter then reinforced the swords by taping two cardboard cutouts together. Next I glued on paper templates ( one on each side ) so that the kids had a guideline on where to place their squares. They were each given a cardboard sword to customize just peel and stick and this kept them happy for another hour. Note - you could cut swords from insulation foam but it is messier and actually not as strong as the cardboard . The foam pickaxe actually did not survive the party it snapped in half but the cardboard swords will last a long time.
FOOD: We used food that was also in the Minecraft game. Chicken beef bananas red apples and golden delicious apples melon etc. For drinks we had water and various colours of pop as Minecraft "potions". The kids liked mixing the potions to create new drinks - apparently grape orange and cream soda make a delicious potion but I was not brave enough to try it.
CAKE: Basically a reproduction of the birthday cake you see in the Minecraft world. Stack enough 8x8 square cakes on top of each other to make a cube then frost the bottom half with chocolate frosting and the top half with white frosting. Cut strawberry fruit by the foot into red squares to decorate the top as in the Minecraft image. The tricky part was getting silver squares along the edge and sides. For this I bought a white sugar sheet and spray painted it with edible silver spray. To be honest the cake didn't look great the first time - the top half was crumbling because I only used egg whites and it wasn't firm enough and the silver trim around the edge just looked like I was trying to duct tape the cake together. Solved this problem by scrapping the top half of the cake going to the grocery store and buying a flat white slab cake which I then cut to fit and stuck on top. Perfectly flat. Why didn't I think of the that the first time.
FAVORS: For their loot bags the kids got to keep any gems they found plus their Minecraft sword their flashlight and we added some Swarovski crystal cubes from the bead shop and some cube shaped money banks from the dollar store. Also some Caramilk bars because they break into - what else - squares. "
_______________________
About | Privacy Policy | Contact Us
.