
Castle Capers -5yr- Gingerbread Dragons
Idea#
11559
From
Ariane in New Zealand
Date
July 2005
Award
Runner-Up
CASTLE CAPERS FIVE YEAR OLD Ever since my son saw a jousting contest at a fair, he has been fascinated with knights and castles. So we started planning a castle party for knights and princesses, and the preparation ended up being half the fun!
SETTING THE SCENE: We have a large play room for the kids, and we decided to build a castle into the playroom. It was a simple one from one large piece of custom wood, which we cut out turrents across the top and a cut a small window in the middle. We then nailed it across one corner of the playroom. We made a rudimentary pulley system to open and close the simple drawbridge, and draped purple pennants across the top. It looked fantastic. Inside the castle we had a rack of kids dress up with lots of different cloaks and head pieces, for the kids to try on. We made a throne by nailing a piece of wood wed cut into a three pronged crown onto the back of an existing little kids wooden chair.
Then we painted it and stencilled a picture of the fluer de lis on the top and draped it with purple satin, and stapled it to the chair. My son sat on it in his royal robe and knighted everyone as they came in and gave them a medal as they gave him their gifts. We took photos of this for their thank you cards. Next to the castle we nailed to the wall a piece of timber with holes in it. I bought off ebay a bulk lot of hobby horse heads so I just had to add the sticks and rope and put one in each hole and this became the stables. I wanted it to look like a medieval fair with tents everywhere so I had two kids pop up tents which were castle tents which connected by a tunnel. I just took the tunnel out and put kids activity tables in them of castle blocks and a bean bag with a toy castle for the littler kids to retreat to.
On arrival after they were knighted, the girls went off to a large table (which had castles and dragons painted on it) and saw my step daughter to buy a princess hat and sceptre from the Sceptre Supplies and Maid Marions Millinery tent. I had a book shelf with 12 cubby squares with a hat in each cubby. Iæd painted purple and red stripes in fabric paint on a fabric tent fly over, which was draped over the top of the bookshelf.
CRAFT ACTIVITIES: The little princess each chose a princess hat. I had made them by gluing cardboard into a cone, then hot gluing purple satin over it. I hot glued matching purple chiffon out the top, and then glued wide gold and purple ribbon with the wire in it around the bottom and put elastic to go under their chin. In the centre of the table on a selection of baskets the girls had different things they could decorate it with. I had dazzle dots, sequins, fabric roses, pom poms on string, metal embellishments (used in scrapbooking so were nice and flat) and other sewing accessories. I had glue and clear double sided dots for them to stick onto the hats.
The girls loved it and the sparkly items were very popular making the hats personalised and adorable. The girls also chose a wooden sceptre. This was a wooden star nailed to a piece of wood, which was pre-made and Id bought from the craft supply shop. I spray painted them gold and silver. The girls could glue on acrylic jewels and glitter. They also looked great and parents have told me that these have outlasted any other wands they have bought from shops!
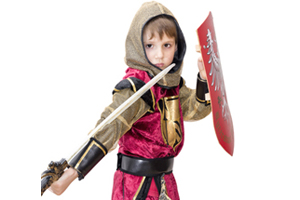
For the boys I made them helmets. I made them by cutting out two circles 9 inches in diameter, and then cut 1/8 out of each circle out and glued each circle to make it concave. Then I cut a piece of rectangle cardboard 12 inches by 5 inches and cut one inch tabs along the length of the rectangle. I placed the rectangle in the centre and glued the tabs to each of the concave circles. To make the visor I just paused Shrek 1 and drew a visor in card similar to that, and attached it with a split paper fastener. I stuck a small card cone on the top, and then sprayed the whole thing inside and out with silver metallic paint. I lined them all up and the boys could choose one and put a feather in the top to distinguish theirs and they had cardboard shields they could also decorate. The shields got abandoned though they were more interested in playing on their horses.
There was also a table with dragon eggs. I had used the recipe from an idea on this website (idea 9070) and made dragon eggs with dinosaurs inside them. I made them deliberately with bits of the feet sticking out so it looked like they were trying to hatch. I put the eggs in a hanging basket liner, and put a toy dragon on top, so it looked like a nest. Then I gave the kids a noodle box with a little tag on it which said Please take care of this egg. If it does not hatch within three days, please help the baby dragon out by gently tapping the eggs three times. Remember: dragons need food, drink, exercise and lots of love. The kids had to decorate their noodle box which was their pet transporter and fill with wood chips to protect their egg to take home. This was a huge hit, and parents were telling me afterwards, how these little dinosaurs were looked after so well as the kids followed the instructions to the letter, making beds for them, and giving them bowls of water and food. Sooo cute!
PARTY FOOD: The banquet food was served on a big banquet table. I made dragon gingerbreads (using a dinosaur cutter and iced on wings), red jello in chocolate moulds of hearts, mini cupcakes with a crown cut out of roll up fruit straps, mini sandwiches using a crown cutter, and then the usual party food. I had round flat baskets (that you put paper plates in) spray painted silver to look like silver plates, and used glass paint on plastic goblets to decorate the glasses. For the centre piece I had a pop up book of a castle and my son and I had made a mini castle out of sugar cubes and egg white icing but we ran out of room on the table for it.
GAMES: When the sugar rush kicked in from the party food, we all piled outside for a jousting game. The boys in particular loved getting kitted out in their helmet and on their hobby horse. We had a line of hay bales and in the middle my husband put a wooden post like a t and then made two hoops out of hose joined together. Each child had to run down the side of the hay bales and put their swimming noodle in the hoop. It was harder than it looked trying to see out of their visor and hold onto the noodle jousting stick and the hobby horse and run. The older kids especially loved it. We also had a game of Pin the Sword on the Lord (of the manor). I had painted a knight on a big poster and made cardboard swords with the name of each child printed on the handle. They had to try and stick it on the knights hand.
LOOT BAG: I bought off ebay a bulk lot of new jewellery bags, the black velvet ones with the gold ties, and stencilled on in gold shiny fabric paint a fluer de lis, and filled it with chocolate money. I gave them to each child and said it was money from the king, and that in times of old they had money pouches instead of credit cards and wallets! The kids also got to keep their sceptres, hats, dragon eggs and helmets as their take home gift. It was a huge success and everyone is still talking about it. With thirty kids and all the parents staying as well, it ended up being a great social event!
_______________________
About | Privacy Policy | Contact Us
.